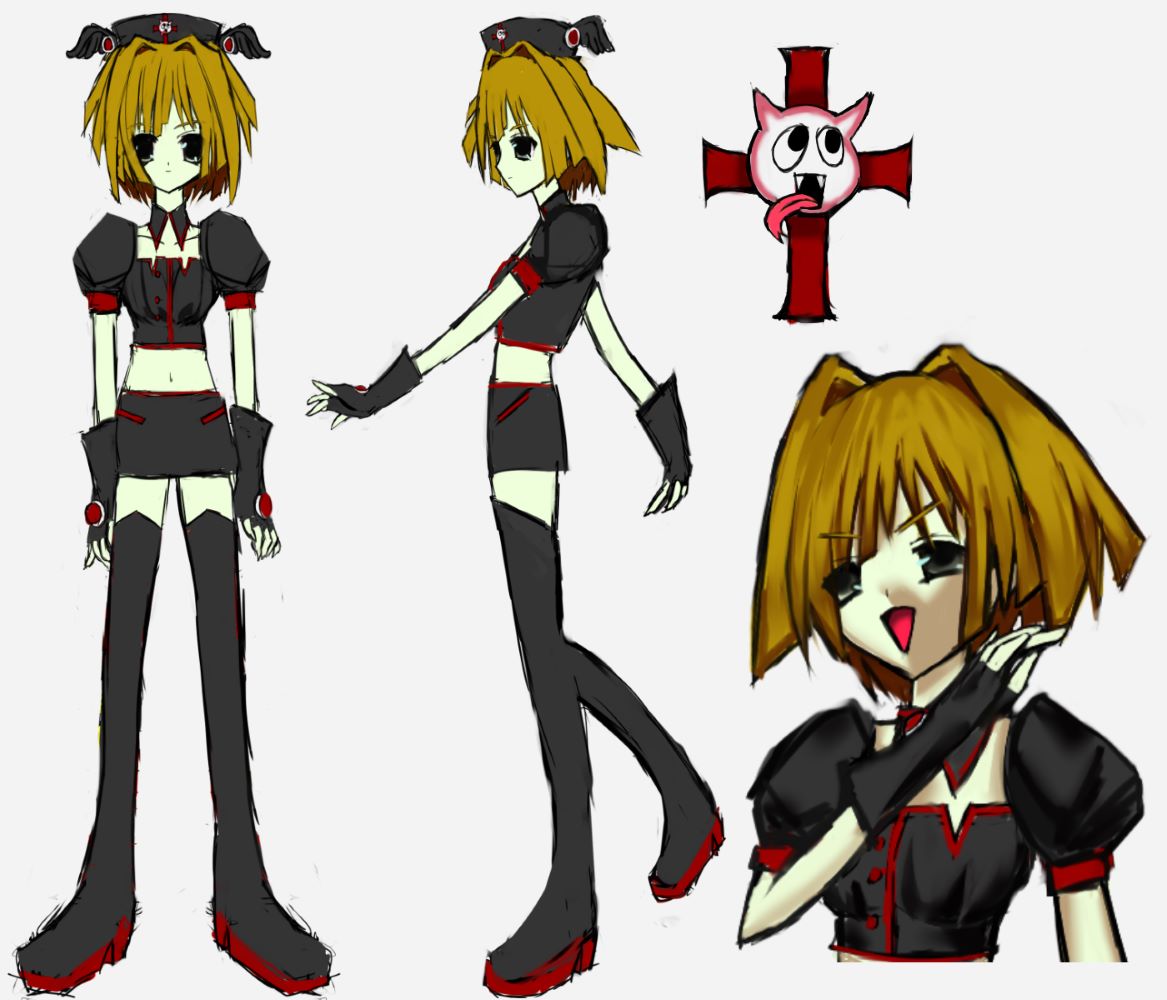
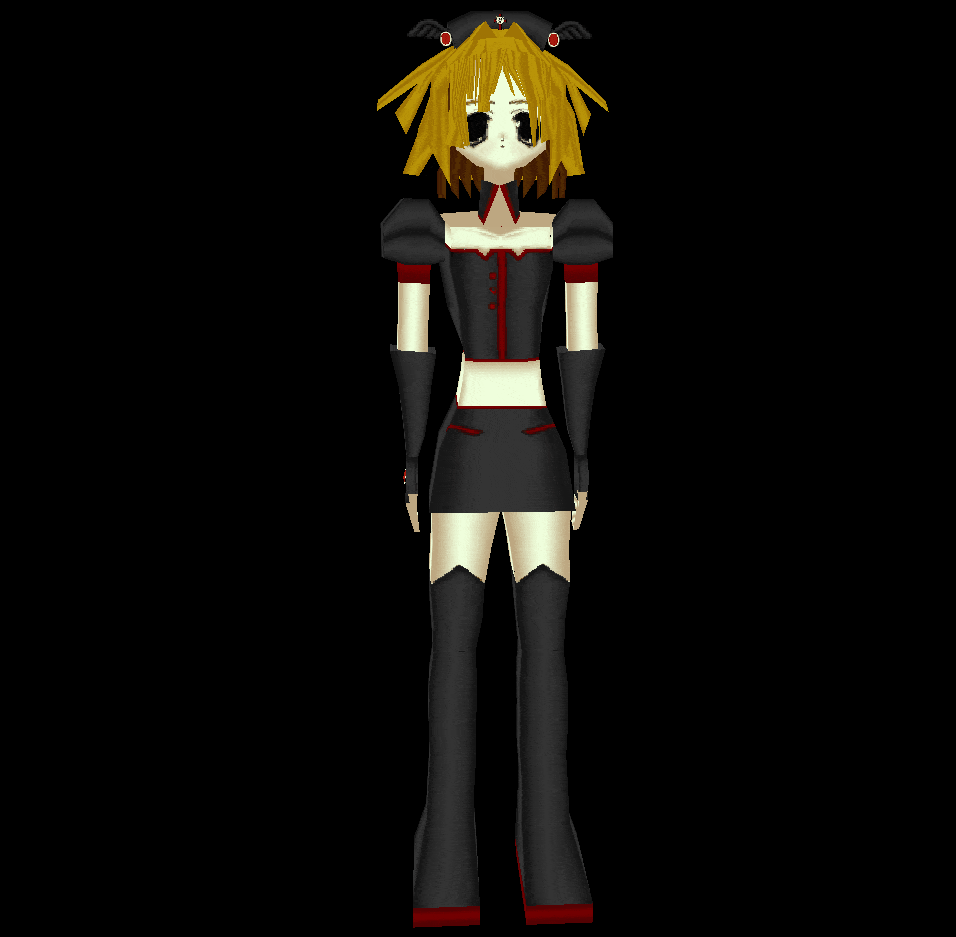
Decided to revisit a 3D low-poly model of mine from 2022. The OC reference sheet dates back to 2022, originally, this was drawn for a game concept I had. The game project is "MOLTING", it's a long story behind the current delay. I want to prioritize a shorter game project first, as MOLTING is likely to be a Steam release. I'll discuss more in my Devlogs or future blog postings.


I made another tutorial guide for those who have imported models from Crocotile 3D, Blockbench, Sprytile, etc. and want to add a retro render for it in Blender 3D. I hope this is useful for you.
You can click on the guide to save a copy to follow along.

Text Transcript: For those who use screen readers or prefer reading plain text over images, the contents of the guide are listed below.
BLENDER RETRO MODEL RENDER SETUP (5.1.2) BY PINKFIREMAGE
-
Step 1: Open the Shading Workspace
- Look at the top of the Blender window and click on the Shading tab. This opens the Shader Editor (the workspace where material boxes, or nodes, are connected).
-
Step 2: Switch to Material Preview Mode
- To see the texture on the model, click the third sphere icon (Material Preview) in the top-right corner of the 3D Viewport.
- Shortcut: Press Z on the keyboard and select Material Preview from the menu. Without this, the model will just look like a solid grey shape.
-
Step 3: Check the Image Texture File Path (The Pink Model Fix)
- In the Shader Editor, locate the orange Image Texture node.
- Verify that it points to the correct image file. If the entire model appears solid pink, this indicates a broken file path (missing texture), meaning the source image must be relinked.
-
Step 4: Make the Pixels Sharp
- On the same Image Texture node, find the drop-down menu that currently says Linear.
- Change this setting to Closest. This stops Blender from blurring the texture and forces it to display sharp, pixelated details.
-
Step 5: Remove the Plastic Shine
- Locate the large Principled BSDF node next to the texture node.
- Set the Roughness value to 1.0 (making the material completely matte).
- Set the IOR Level value to 0.0 to remove all light reflections.
-
Step 6: Make the Edges Pixelated (Disable Anti-Aliasing)
- Go to the Render Properties tab on the right side of the screen (represented by a camera icon).
- Expand the Film section.
- Change the Filter Size from the default 1.50 px down to 0.00 px (or 0.01 px depending on the render engine in use). This turns off edge-smoothing, making the silhouette of the model appear jagged and aliased.
-
Step 7: Restore the Original Colours
- Still in the Render Properties tab, scroll down to the Color Management section.
- Change the View Transform from AgX or Filmic to Standard.
- Ensure Exposure is set to 0.0 and Gamma is set to 1.0. This prevents Blender from washing out or desaturating the original colours of the pixel art.
And there it is!!
I hope to document more of my retro graphics and pixel processes here in the future. Thank you for reading!
The final result can be found posted here: